Welcome to Smogon! Take a moment to read the Introduction to Smogon for a run-down on everything Smogon, and make sure you take some time to read the global rules.
The mushrooms have risen... and they intend to spread all over the surface of the globe! Their main node: this foggy swamp where you swear every root is a writhing piece of mycelium... The air is thick with latent spores and you've taken precautions to obstruct your mouth and nose. There! In the stump of a once-great tree! There's the Spore-verlord!
Camouflage: Grass | Nature Power: Spore | Secret Power: 20% chance to inflict Sleep on the defender.
Phase 1 - Spore Proliferation
---
Phase 2 - Dramatic Duels
As this phase starts, pair each minion with a different random raider, who becomes the minion's assigned target (even if any raiders are fainted). Each minion's behaviors refers to their assigned target.
While any Minion has positive remaining HP during this phase: Minions are Unfainting.
Phase 3 - Neurotoxic Reversion
As this phase starts, discard any Weather in play; then, if no other Weather is in play, create Sun with indefinite duration.
Rewards
Player Progress: Phases Completed / 3
Entry Cost: 7 JC
Progress: 7 EXP for each raider.
Victory: 3 EXP more for each raider.
First-Time Victory: Engineer, Reporter, and Scribe vocations
Referee Progress: Rounds reffed by that referee / Total Rounds.
"??" stands in for seven times (x7) the current round count.
Crunch =??
Lash Out x3
Fling x10
Heavy Slam x2
Heat Crash x2
Drain Punch x2
Knock Off x2
Bulldoze =10
Snarl =10
Sludge Wave =15
Body Press x2
Phase Progression:
Guzzlord (★) x1
Guzzlord (★) x1
Guzzlord (★) x1
Don't bench or send out Raid opponents when progressing through these Phases.
Raid Arena — The Feeding Trough Located somewhere deep within Ultra Space, this bizarre dimension is made of wavy ground and walls that slowly shift towards Guzzlord, helping the lazy beast nourish itself, as if mimicking a black hole.
Camouflage: Dragon | Nature Power: Dragon Rush | Secret Power: 10% Chance to free the defender's Ingested Pokemon, if any.
All Phases - An Acquired Taste
As the Boss "Ingests" a Pokemon, that Pokemon is captured.
As the Boss "Regurgitates" a Pokemon, that Pokemon rejoins their original team.
While the Boss has an Ingested Pokemon:
The Boss and their Belch both have the Ingested Pokemon's types; also, the restriction text of the Boss' Belch is ignored.
Ingested Pokemon can't take turns or act, and are unaffected by non-arena effects. Actions can't target ingested Pokemon.
Phase 1 - Appetizer
At the end of each Raider's turn: The Boss regurgitates any Ingested Pokemon; and then ingests that Raider.
Phase 2 - Intradimensional Intestional Ingression
At the end of each round: The Boss regurgitates any Ingested Pokemon; and then, the Boss ingests a raider at random, from among the raiders that have been ingested the fewest times this battle.
Phase 3 - World is Meal
As this phase begins, the Boss regurgitates any Ingested Pokemon.
Rewards
Player Progress: Phases Completed / 3
Entry Cost: 7 JC
Progress: 7 EXP for each raider.
Victory: 3 EXP more for each raider.
First-Time Victory: Bodyguard, Rearguard, and Blackguard vocations to your profile.
Referee Progress: Rounds reffed by that referee / Total Rounds.
Raid Arena — The Kitakami Mask Festival A well-known piece of folklore in Kitakami tells of the Loyal Three, who gave their life protecting the village from a frightening ogre... The day of their resurrection should have been joyous, yet panic swiftly spread at the Festival of Masks as the reborn three started guzzling food, seizing things, and terrorizing tourists! No one at the Festival can stand up against their power. No one... but you! Please, save the reven- I mean, the spirit of the festival!
Camouflage: Grass | Nature Power: Substitute | Secret Power: 20% chance for the user to equip an Oran Berry.
All Phases - Loyalty among Thieves!
The Loyal Three have Villainous Vocations, granting their team special effects while in play.
Okidogi is a Prowling Pugilist.
Each Boss' Attack and Special Attack ranks are at least 12.
The effects of Screens on the raiders' field are ignored.
Munkidori is a Threatening Thief.
When the user lowers a raider's stat stage: Each Boss has the same stat stage raised, by the same amount, for the same duration.
Bosses have Evasive against attacks from Protectors and attacks from Supporters.
Fezandipiti is a Dastardly Duelist.
If a Boss would take damage from a hit; instead, that boss takes five (5) less damage, and the attacker loses five (5) HP.
Bosses have Defense Aid.
Each member's Villainous Vocation applies only while they are in play.
Phase 1 - Caught in the Act!
---
Phase 2 - Sinister Sabotage!
While one Boss has less remaining HP than the other: That lower-HP Boss can't take damage; and attacks can't target them.
Phase 3 - Dastardly Delta Attack!
At the end of each round, choose a Loyal Three member at random to be the Leader, from among the non-Fainted members that have been chosen the fewest times this Raid.
(The Leader will take more turns in the upcoming rounds.)
Rewards
Player Progress: Phases Completed / 3
Entry: 5JC
Progress Reward: 6 EXP for each raider.
Victory Reward: Choose one of the following rewards:
Okidogi Lv2
Munkidori Lv2
Fezandipiti Lv2
1xCornerstone Mask
First-Time Victory: Pugilist, Thief, and Duelist vocations
Referee Progress: Rounds reffed by that referee / Total Rounds.
Hydro Pump
Dark Pulse
Ice Beam
Grass Knot
Gunk Shot
Low Kick
Rock Slide
Phase Progression
Shedinja (★), Ninjask x1 each
Shedinja (★) x1, plus two different Students except Zoroark-Hisui, chosen at random.
Shedinja (★) x1, plus the three Stundents not chosen last Phase.
Don't bench or send out Shedinja when changing Phases.
The students are Greninja Weezing, Drapion, Golisopod, and Zoroark-Hisui.
Remember to designate a confidant for Zoroark-Hisui's Illusion.
Raid Arena - Hidden Ninja Dojo This strange dojo, said to be manned by no one, is hidden behind a swamp (you hear some people talk about funny mushrooms growing nearby). Its old, moldy wooden doors open for you before shutting off with a worrying amount of force once you're in. In the center of a perfectly round room, a mysterious silhouette is floating above the floor... You're pretty sure the room is full of hidden contraptions, too.
All Phases - Intangibile Shadow Ninja Master
Shedinja has no HP parameter. They can't gain or lose HP, and their HP can't be set.
At the end of each round, if the Raid only has Shedinja in play: Progress the Phase.
Phases 2 and 3 - Aspiring Shadow Ninja Kumite
If a Student would take damage from a Field Hazard; instead, that student takes three times (x3) that much damage.
While the Raid's Weezing is in play: Other Students have Neutralizing Gas.
At the end of each round, if none of the Raid's Pokemon have fainted this round or last round: The challenger loses the battle.
Rewards
Player Progress: Phases Completed / 3
Entry Cost: 5 JC
Progress: 7 EXP for each raider.
Victory: 3 EXP more for each raider.
First-Time Victory: Daredevil, Tutor, and Psychic vocations
Referee Progress: Rounds reffed by that referee / Total Rounds.
Behavior
None. Tinkatink aren't capable of fighting back against Pokemon; but they deal huge damage to structures.
(With no behavior; they don't receive any orders or take any turns at all.)
The Coalition Commander (Corviknight) The final hope of the Korvid Kingdom's forces!
Order Behavior
As a player Guest, The Coalition Commander takes orders from the player. The Coalition Commander knows the following moves:
Armor Cannon
Close Combat
Coaching
Defog
Headlong Rush
Guard Swap
Light Screen
Reflect
Roost
Taunt
Phase Progression
Phase
West Portion
North Portion
East Portion
1
Tinkatink Warrior x1
Tinkatink Warrior x4
Tinkatink Warrior x1
Phase
Portion A
Portion B
Portion C
2
Ocean-Might General x1
Spiral-Shell General x1
Tinkatink Warrior x5
3
Sharp-Edge General x1 Tinkatink Warrior x3
Earth-Moving General x1 Tinkatink Warrior x3
Tinkatuff Elite x1
4
The Scourge Warlord x1
Tinkatink Legion x20
Tinkatuff Elite x2
For waves after the first, randomize which Wall each portion of the wave spawns in; with one portion per Wall.
Don't withdraw any Raid Pokemon as phases changes. (Add the new wave to what's already in play.)
Guest Ally: The Coalition Commander
(Guest allies are added to your Reserve at the start of battle. They don't count towards your "bring" limit.)
Raid Arena — The Coalition Castle
The two armies regularly clash in Eastern Paldea, over a dusty strip of wasteland on the southmost shore. The metal-rich soil makes it a favored place for both people, and the inevitable territorial war only adds more metal to the earth as bodies fall...
The scrap-seeking Scourge Legion now marches from the north, seeking to dismantle all that we hold dear for parts. Is this the Coalition's last stand?
Camouflage: Steel | Nature Power: Metal Sound | Secret Power: 50% chance to lower the defender's Defense by one (1) for their next three (3) turns.
All Phases - The Battle for the Korvid Kingdom
The battlefield is divided into four "zones": the West Wall, the North Wall, the East Wall, and the Korvid Kingdom's Keep. These zones affect the battlefield in a myriad of ways:
Each wall has 500 Structure HP; and the Keep has 2,000 Structure HP.
Actions and effects of Pokemon can only affect other Pokemon in the same zone.
Field Conditions are confined to the zone they're created in.
Battle Conditions affect and are affected by every zone.
As any Pokemon changes zones, it leaves play in the first zone, and then enters play in the destination zone.
For their turn, each Scourge Invader will do one of the following, starting from the top:
First, if any player-controlled Pokemon is present in their zone, they'll perform their ordered action as normal.
Else, if no player-controlled Pokemon is present in their zone, and their zone still has any Structure HP remaining, they'll deal their listed Structure Damage to the Zone.
Otherwise, they'll move to the Keep.
At the end of the round, if it is the second round of this Raid phase: Advance the Raid phase.
If a Wall runs out of Structure HP, it is destroyed. If the Keep runs out of Structure HP, the player loses the battle.
All Phases - Defending the Keep
As the raid begins; the PR starts in the West Wall, The SU starts in the East Wall (not the North), and the AG starts in the North Wall (not the East). The Corvid Commander starts in the Keep, and takes orders from the player.
In their order post, before they issue orders; the player may move up to one (0-1) Pokemon they control to another zone. (You can move to destroyed zones to intercept invaders, if needed.)
All attacks, used by Pokemon the player controls, target "one other Pokemon".
(Tinkatink Warriors and Tinkatuff Elites have Traits that cause excess damage from attacks to "spill over" to the next Warrior or Elite.)
All Phases - The Last Line of Defense
When Scourge invaders faint, their listed value in Gimmigold is paid to the challenger.
In their order post, before they issue orders, the challenger may spend their Gimmigold to place Forretrifications on a Wall or the Keep; and to upgrade their Forretrifications. Forretrifications may also be dismantled if desired, but no Gimmigold is refunded.
Each wall has room for 2 Forretrifications by default, and the Keep has room for 4 Forretrifications.
Forretrifications in destroyed zones continue to function, if their effects are applicable, and they can still be upgraded.
Forretrification List
Each Forretrification costs a certain amount of Gimmigold to place. The price of upgrading a Forretrification is twice (x2) the cost of creating it.
Upgrading a Forretrification replaces a portion of its effect text with the chosen upgraded text. A Forretrification can be switched between its A and B upgrades by spending the upgrade cost again, but can't have both upgrades at once.
The available Forretrifications, and their upgrades, are as follows:
Forretrification
Gimmigold
Effect
Upgrade A
Upgrade B
Excadrilling
10
Scourge Invaders in this zone, that spawned [this round], can't [change zones] or damage structures.
"this round"
→ "this or last round"
"change zones"
→ "change zones, act"
Ghold Mine
10
If you would earn Gimmigold in this zone; instead, gain [twice (x2)] as much Gimmighold.
Limit one (1) Ghold Mine.
"twice (x2)"
→ "thrice (x3)"
"one (1)"
→ "one (1) un-upgraded"
Aegismithy
10
Damage dealt to the raiders, the Commander, and structures [in this zone] is reduced by [five (5)].
(As a reminder, the Piercing modifier doesn't mention Arena effects.)
"in this zone"
→ "in any zone"
"five (5)"
→ "fifteen (15)"
Kartarmory
50
Scourge Invaders [in this zone] take [double (x2)] damage from all sources.
"in this zone"
→ "in any zone"
"doubled (x2)"
→ "quintupled (x5)"
Celemplacement
500
At the end of each step: Each Boss loses HP, equal to [100] plus [one-tenth (x0.1)] of their remaining HP.
Limit one (1) Celemplacement.
"100"
→ "300"
"one-tenth (x0.1)"
→ "one-fifth (x0.2)"
Managing your Kartarmories, and upgrading them correctly for your team, is the key to this encounter.
Rewards
Player Progress: Phases Completed / 4
Entry Cost: 7JC
Progress Reward: 4 EXP for each raider.
Victory: 2 EXP more for each raider.
First-Time Victory: Paladin, Cleric, and Sorcerer vocations to your profile.
Referee Progress: Rounds reffed by that referee / Total Rounds.
Once, the islands of Alola faced an incursion of bizarre invaders — Pokemon-like entities known as Ultra Beasts from beyond our world. Fearful of their power, a secret project was initiated to engineer a Pokemon capable of destroying them. The proposed living weapon would adapt itself based on battle data recorded from combat with the Ultra Beasts. Long before the project could be brought to fruition, however, the Ultra Beasts were brought to heel by the island's inhabitants and their guardians. The invaders, such as they were, were lost and confused in a dimension foreign to them, and an understanding was reached between the two groups.
However, the creators of the secret project remained paranoid of their quarry. In their haste to finish the weapon, they left them fatally flawed and incapable of telling friend from foe. Their initial test spelled disaster for their creators, and their unceasing mission to destroy possible threats spiraled out of control. Far from any trace of civilization, the creation that was made to protect the island from the extradimensional menace yet prowls, perceiving any life-form they meet as a threat to be laid low...
Camouflage: Normal | Nature Power: Multi-Attack | Secret Power: Lower the defender's Attack and Special Attack stages by one (1) for their next three (3) turns.
Rapid Beast-Killing Type Adaptation
Silvally starts with 17 Memory items—one of each type—in their Backpack.
When Silvally takes a hit from an Attack: For each type of that Attack, destroy the matching Memory item from Silvally's Backpack.
At the end of each round:
If Silvally has any Memory items in their Backpack: Destroy all items Silvally is holding; then, they equip one of those Memories at random.
Otherwise: The challenger loses the battle.
Type-Adapted Battle Procedures
Apply the appropriate effect of Silvally's current held Memory found in the hide tags below. Additionally, Silvally's Behavior varies depending on their currently held Memory item, found in the hide tags below. (If Silvally is holding no Memory, use the Normal data.)
Memory Effects and Moves:
Bug
When Silvally equips the Bug Memory: Reset Silvally's negative stat stages to 0.
Order Behavior
Bug Buzz x2
Megahorn x2
Lunge x2
Struggle Bug =10
Quiver Dance
Dark
While Silvally is holding the Dark Memory: Silvally has Prankster in additionally to their other abilities.
Order Behavior
Knock Off x2
Night Daze x2
Ruination
Taunt
Torment
Dragon
When Silvally equips the Dragon Memory: Inflict Flinching on the Aggressor, if any.
Order Behavior
Glaive Rush x2
Spacial Rend x2
Breaking Swipe =10
Dragon Cheer
Dragon Dance
Electric
When Silvally equips the Electric Memory: Discard all Terrain, then create Electric Terrain for 10 rounds.
Order Behavior
Bolt Strike x2
Electro Drift x2
Discharge
Nuzzle
Magnet Rise
Fairy
When Silvally equips the Fairy Memory: Raise Silvally's Special Attack stage by two (2) for four (4) turns
Order Behavior
Moonblast x2
Spirit Break x2
Light of Ruin x2
Draining Kiss x2
Geomancy
Fire
When Silvally equips the Fire Memory: Discard all Weather, then create Sun for 10 rounds.
Order Behavior
Fire Blast x2
Sacred Fire x2
V-create x2
Eruption
Will-o-Wisp
Fighting
When Silvally equips the Fighting Memory: Raise Silvally's Attack stage by two (2) for four (4) turns
Order Behavior
Low Kick x2
Focus Blast x2
Low Sweep x2
Circle Throw x2
Detect
Flying
When Silvally equips the Flying Memory: Discard all Weather and Terrain.
Order Behavior
Sky Attack x2
Oblivion Wing x2
Bounce x2
Air Cutter x2
Roost
Ghost
When Silvally equips the Ghost Memory: Inflict Flinching on the Supporter, if any.
Order Behavior
Shadow Force x2
Infernal Parade x2
Astral Barrage
Shadow Sneak x2
Confuse Ray
Grass
When Silvally equips the Grass Memory: Discard all Terrain, then create Grassy Terrain for 10 rounds.
Order Behavior
Power Whip x2
Seed Flare x2
Drum Beating x2
Spore
Victory Dance
Ground
When Silvally equips the Ground Memory: Inflict Grounded on all raiders for the rest of the battle.
Order Behavior
Thousand Arrows x2
Earth Power x2
Precipice Blades
Bulldoze =12
Shore Up +30
Ice
When Silvally equips the Ice Memory: Discard all Weather, then create Snow for 10 rounds.
Order Behavior
Freeze-Dry x2
Triple Axel x2
Blizzard
Aurora Veil
Haze
Normal (Default)
(There is no Normal Memory. Silvally starts with this Behavior Pool in the first round.)
Order Behavior
Swords Dance
Bulk Up
Nasty Plot
Calm Mind
Substitute
Poison
When Silvally equips the Poison Memory: Raise Silvally's Special Defense stage by two (2) for four (4) turns
Order Behavior
Gunk Shot x2
Dire Claw x2
Sludge Wave
Toxic
Baneful Bunker
Psychic
When Silvally equips the Psychic Memory: Discard all Terrain, then create Psychic Terrain for 10 rounds.
Order Behavior
Psychic x2
Psystrike x2
Magic Coat
Reflect
Light Screen
Rock
When Silvally equips the Rock Memory: Discard all Weather, then create Sandstorm for 10 rounds.
Order Behavior
Meteor Beam x2
Paleo Wave x2
Rock Slide =10
Salt Cure x2
Tar Shot
Steel
When Silvally equips the Steel Memory: Raise Silvally's Defense stage by two (2) for four (4) turns
Order Behavior
Steel Beam x2
Double Iron Bash x2
Metal Burst x2
Make It Rain
Shift Gear
Water
When Silvally equips the Water Memory: Discard all Weather, then create Rain for 10 rounds.
Order Behavior
Hydro Pump x2
Wave Crash x2
Hydro Steam x2
Dive x2
Soak
Rewards
Player Progress: Boss missing HP / Boss Maximum HP.
Entry Cost: 10JC
Progress: 8 EXP for each raider.
Victory: 2 EXP more for each raider.
First-Time Victory: Commando, Butler, and Gambler vocations
Referee Progress: Rounds reffed by that referee / Total Rounds.
G-Max Iron Head
G-Max High Horsepower
G-Max Superpower
Dynamic Punch
Ice Punch
Thunder Punch
Double Iron Bash
G-Max Meltdown
Ignore this action unless Melmetal has one or more Max-Stress markers. Ignore this action unless Melmetal has two or more Max-Stress markers.
Initial Field
1x Machamp, Gengar
Reserve:
1x
Raid Arena — Wyndon Stadium
This Stadium is the most prominent Power Spot in all of Galar. Any Pokemon here can maintain Dynamax far beyond what would be normally possible -at a cost- all to force you, the challenger, to push your limits as well. It's the ultimate test of endurance... Will you outlast those gigantic opponents?
Camouflage: Normal | Nature Power: Max Guard | Secret Power: 10% chance to place a Stress marker on the defender.
Dynamic Intelligence
For each of the Bosses' action slots, the referee will select the action they deem most harmful to the challenger's success, rather than rolling randomly. (After the challenger issues orders, and after any random targets are chosen.)
The Fundamental Forces
At the end of each round:
Send out a Boss from the reserve, chosen at random, except Melmetal. If there's only Melmetal in reserve, send them out. (e.g. Melmetal is always the last Boss.)
Then, send out Bosses in the same way until there are at least three Bosses in play. (Or as many as possible.)
Then, place a Max-Stress marker on each Boss in play.
Damage dealt to a Boss by attacks is multiplied by the number of Max-Stress markers on that Boss. (Even if that number is zero.)
When a Boss faints: Each Raider heals 10 HP and 10 Energy.
The Elemental Expression
Apply the following effects, depending on which Bosses are in play:
Machamp: Bosses are Penalty-Proof.
Gengar: Bosses are Bonus-Proof.
Lapras: Raiders are Doomed.
Butterfree: The abilities of Raiders are ignored.
Snorlax: If a raider would heal HP; instead, each Boss heals that much HP.
Precipice Blades
Stone Edge
Fire Blast
Solar Beam
Thunder Punch
Seismic Toss
Fire Punch
Thunder Punch
Rock Tomb
Thunder Wave
Will-o-Wisp
Bulk Up
While Not Primally Reverted:
Once per battle, the referee may choose to have non-Primal Groudon elevate one ordered move into a Z-Move, using the Z-Harm (as appropriate) or Z-Pierce Z-Powers.
Referee's Choice of Target Raider
Bulk Up
Block
Fling
[Any unused Tendency Move, below]
Groudon can be ordered the following moves, based on the current Terrestrial Tendency.
Origin Pulse
Weather Ball
Blizzard
Thunder
Heavy Slam
Brick Break
Whirlpool
Ancient Power
Scary Face
Thunder Wave
Toxic
Calm Mind
While Not Primally Reverted:
Once per battle, the referee may choose to have non-Primal Kyogre elevate one ordered move into a Z-Move, using the Z-Twin or Z-Wide Z-Powers.
Referee's Choice of Target Raider
Calm Mind
Uproar
Fling
[Any unused Tendency Move, below]
Kyogre can be ordered the following moves, based on the current Thalassic Tendency.
Thalassic Tendency
0+
2+
4+
Tendency Move
Gastro Acid Thief
Light Screen
Defog
Soak
Comeuppance
Mat Block
Sheer Cold
Electro Shot
Initial Field:
1x Groudon, Kyogre
Raid Arena — The Eye of the Storm
Foes for time immemorial, Groudon and Kyogre have vied for all of history, each seeking supremacy over the other. Their conflict arises from their wishes to reshape how life is lived on the planet. Groudon has ever toiled to raise land, where all might live under the light of the sun. Kyogre has ever toiled to carve oceans, where all might live in the caress of the seas.
That they both now encroach upon civilization in stride, shoulder-to-shoulder with each other, bodes terribly ill indeed.
Camouflage: Grass | Nature Power: Hail | Secret Power: Chance to grant the user Defense Aid until the end of their next turn.
Ancient Intellect
For each of the Bosses' action slots, the referee will select the action they deem most harmful to the challenger's success, rather than rolling randomly. (After the challenger issues orders, and after any random targets are chosen.)
The referee decides which Boss orders before the other, which determines the outcome of their Speed tie.
When setting up the raid, the referee chooses one of the Bosses to decline to activate their ability. (That is, the referee selects the initial Weather.)
The Primordial Forces
The raid doesn't lose the battle for having no Pokemon in play.
At the end of each round, in sequence:
If the sum of the arena's Terrestrial Tendency and Thalassic Tendency is seven or more (7+), the challenger wins the battle.
Each Boss that is Primally Reverted transforms to their default Forme (Groudon first) and their HP becomes equal to their new maximum; and then,
Each Boss that is fainted Primally Reverts (Groudon first), discards their Fainting, and loses their HP parameter. (This is after the victory condition is checked. Clearly.)
Weather created by Desolate Land or by Primordial Sea can't be discarded during the round it was created.
While more than one Boss is Primally Reverted:
Bosses deal triple (x3) damage with attacks.
World Tendency
The arena has numeric Terrestrial Tendency and Thalassic Tendency values that each start at zero (0).
As Terrestrial Tendency and Thalassic Tendency rise, Groudon and Kyogre each respectively gain access to more moves.
When Groudon Primally Reverts: Increase the Terrestrial Tendency by one (1).
When Kyogre Primally Reverts: Increase the Thalassic Tendency one (1).
Rewards:
Player Progress: Total Terrestrial Tendency + Thalassic Tendency / Seven (7)
Entry Cost: 16JC
Milestone 2/4: Harvest Event Voucher
Milestone 3/4: Academy Credit
Victory: Groudon Lv2 or Kyogre Lv2
Referee Progress: Rounds reffed by that referee / Total Rounds.


 The Spectacular Spore-verlord!
 The Greater Masticator Invader!

 The "Loyal" Lousy Lackabouts!
 The Shadow-Wielding Master and Students!
 The Cold-Iron Tink-tacular Turf War!
 The Self-Perfecting Beast-Slaying Machine!
 The Fundamental Elemental Procession!
 The Clashing Cataclysmic Colossi!
 The Source of the Enigma.
 Piercing Giga Drain +15
 Triple-Speed Toxic


 Toedscruel,
  Shiinotic,
  Breloom x1 each
 Brute Bonnet (★) x1
 JC
JC Engineer,
  Reporter, and
  Scribe vocations
 RC, 6
RC, 6
 Bodyguard,
  Rearguard, and
  Blackguard vocations to your profile.
 Prowling Pugilist
 Threatening Thief
 Dastardly Duelist
 Cornerstone Mask


 Ninjask x1 each
 Zoroark-Hisui, chosen at random.
 Greninja
  Weezing,
  Drapion,
  Golisopod, and
  Daredevil,
  Tutor, and
  Psychic vocations

 Gimmigold


 Expert Belt
 Tinkatink Warrior x1
 Ocean-Might General x1
 Spiral-Shell General x1
 Sharp-Edge General x1
 Earth-Moving General x1
 Tinkatuff Elite x1
 Forretrifications on a Wall or the Keep; and to upgrade their Forretrifications. Forretrifications may also be dismantled if desired, but no Gimmigold is refunded.


 Paladin,
  Cleric, and
  Sorcerer vocations to your profile.
 Commando,
  Butler, and
  Gambler vocations


 Rand
Rand Rand
Rand


 Harvest Event Voucher
 Academy Credit
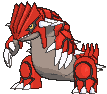

 Primally Reverted:

 Primally Reverted:
 Terrestrial Tendency and
  Thalassic Tendency values that each start at zero (0).